


TOYOTA MAINTENANCE / 2.4L TURBO
Toyota Highlander 2.4L Turbo Oil Change: A Complete Step-by-Step Guide
Changing the engine oil is one of the most important maintenance services you can perform on a Toyota Highlander. It’s also a job where small details matter. Using the wrong oil, overtightening the drain plug, or failing to check the oil filter gasket can turn a routine oil change into an expensive repair.
For the 2023–2024 Toyota Highlander equipped with the 2.4L turbocharged four-cylinder engine, an oil change involves removing the lower engine access panel, draining the old oil, replacing the oil filter and drain plug gasket, adding fresh SAE 0W-20 engine oil, and verifying the final oil level.
The process isn’t particularly complicated when you have the right tools and know where everything is located. However, there are a few things worth checking along the way, especially around the oil filter and drain plug.
Here’s what you need to know about changing the oil in a Toyota Highlander 2.4L turbo, including the correct oil capacity, tools, installation procedure, and maintenance reminder reset.
Toyota Highlander 2.4L Turbo Oil Type and Capacity
Before starting, make sure you’re using the correct oil for your engine. Toyota Highlander models have different engine configurations, and not all of them use the same oil viscosity or capacity.
The 2023–2024 Toyota Highlander with the 2.4L turbocharged gasoline engine (T24A-FTS) requires the following:
| Specification | Details |
|---|---|
| Engine | 2.4L Turbocharged 4-Cylinder |
| Engine Code | T24A-FTS |
| Recommended Engine Oil | SAE 0W-20 |
| Oil Grade | ILSAC GF-6A |
| Oil Capacity With Filter | 5.6 US Quarts (5.3 Liters) |
| Oil Capacity Without Filter | 5.3 US Quarts (5.0 Liters) |
| Oil Filter | Compatible Spin-On Oil Filter |
| Drain Plug Torque | 30 lb-ft (approximately 40 N·m) |
Important: These specifications apply to the identified 2.4L turbocharged gasoline engine. Highlander Hybrid models and other engine configurations may have different requirements. Always confirm the specifications for your vehicle’s exact model year.
The listed oil capacity is a reference amount. You should still check the dipstick after filling the engine to make sure the oil level is correct.
Tools and Supplies Needed
Before getting underneath the vehicle, have everything ready. Once the drain plug is removed and the oil is flowing, you don’t want to find out you’re missing a new gasket or the correct filter.
For this oil change, you’ll need:
- 6 quarts of SAE 0W-20 engine oil meeting Toyota specifications
- A new engine oil filter compatible with the 2.4L turbo engine
- A new oil drain plug sealing washer
- 10 mm socket
- 14 mm socket
- Ratchet and torque wrench
- Oil filter wrench
- Oil drain pan
- Oil funnel
- Clean shop towels
- Protective gloves
- Properly rated vehicle ramps or jack stands if additional clearance is required
Park on a level surface and make sure the vehicle is stable before starting. If the vehicle needs to be raised, use the correct lifting and support points. Never get underneath a vehicle supported only by a floor jack.
Allow hot engine and exhaust components to cool enough to work safely.
How to Change the Oil in a Toyota Highlander 2.4L Turbo
01 Step 1: Remove the Lower Engine Access Panel
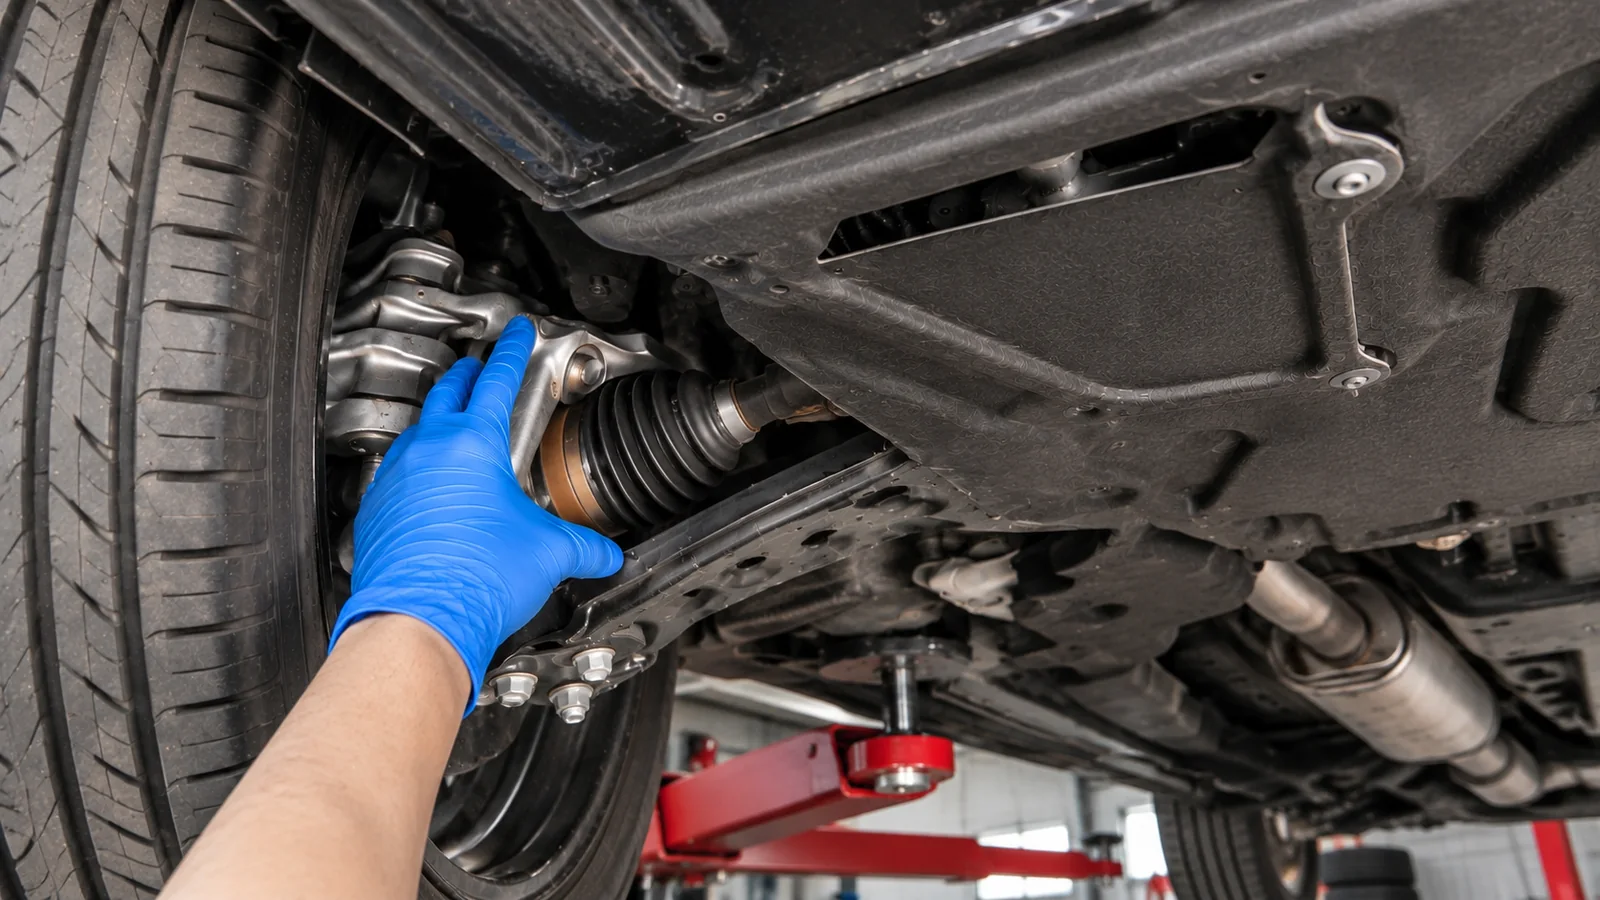
The first thing you need to do is access the oil drain plug and oil filter.
On the Toyota Highlander 2.4L turbo, both components can be reached from underneath the passenger side of the engine.
There’s a small removable section of the lower splash shield covering the area. It’s held in place by four fasteners that can be removed with a 10 mm socket.
Remove the fasteners and carefully lower the access panel.
With the panel out of the way, you’ll be able to see the engine oil pan, drain plug, and spin-on oil filter.
Before removing anything else, take a quick look around the area. Check for fresh oil residue around the oil pan, drain plug, and filter housing.
A little dirt or road grime is normal, but wet oil around a sealing surface could mean there’s already a leak that needs attention.
02 Step 2: Drain the Old Engine Oil
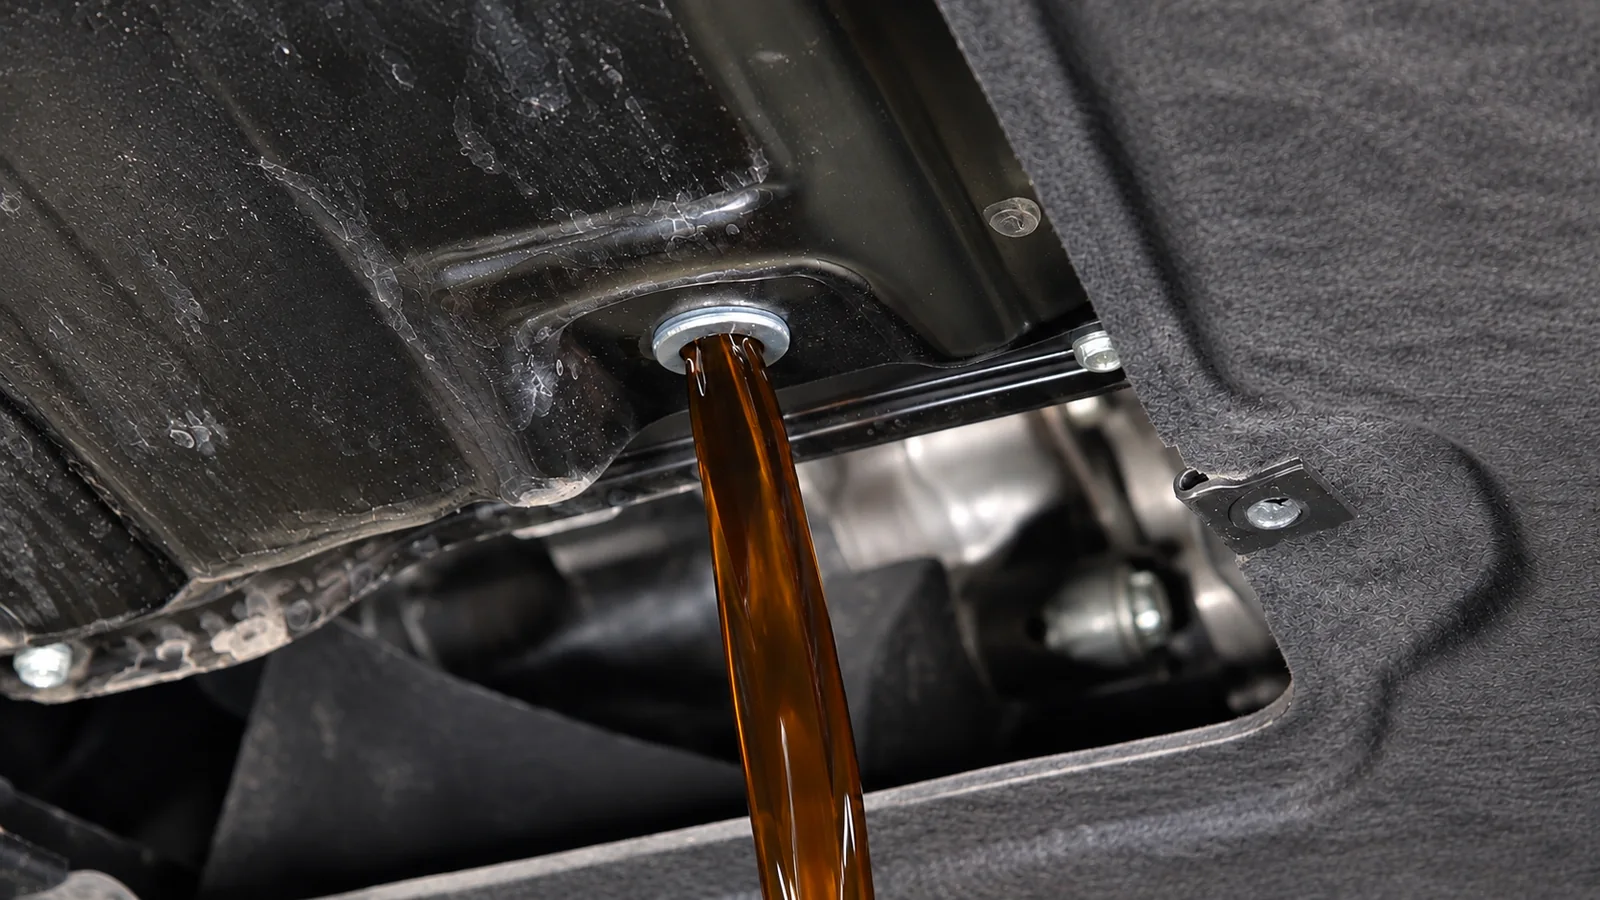
Locate the oil drain plug at the bottom of the engine oil pan.
Place your oil drain pan underneath the plug, making sure it’s positioned to catch the oil when it starts flowing.
Using a 14 mm socket, carefully loosen the drain plug by turning it counterclockwise.
Once it’s loose, finish removing it by hand.
A useful trick is to maintain light pressure against the drain plug while turning it. This keeps the oil from coming out until the plug reaches the last thread. When it’s ready, pull the plug away quickly and let the oil drain into the pan.
Be careful if the engine was recently running. Even after shutting it off, engine oil can remain hot enough to burn your skin.
Let the oil drain until the steady stream slows to an occasional drip.
While the oil drains, it’s worth checking its condition. Oil naturally becomes darker with use, so color alone doesn’t tell you whether it’s worn out. However, visible metallic particles, a milky appearance, or an unusual smell may indicate a problem that deserves further inspection.
03 Step 3: Inspect the Drain Plug and Replace the Washer
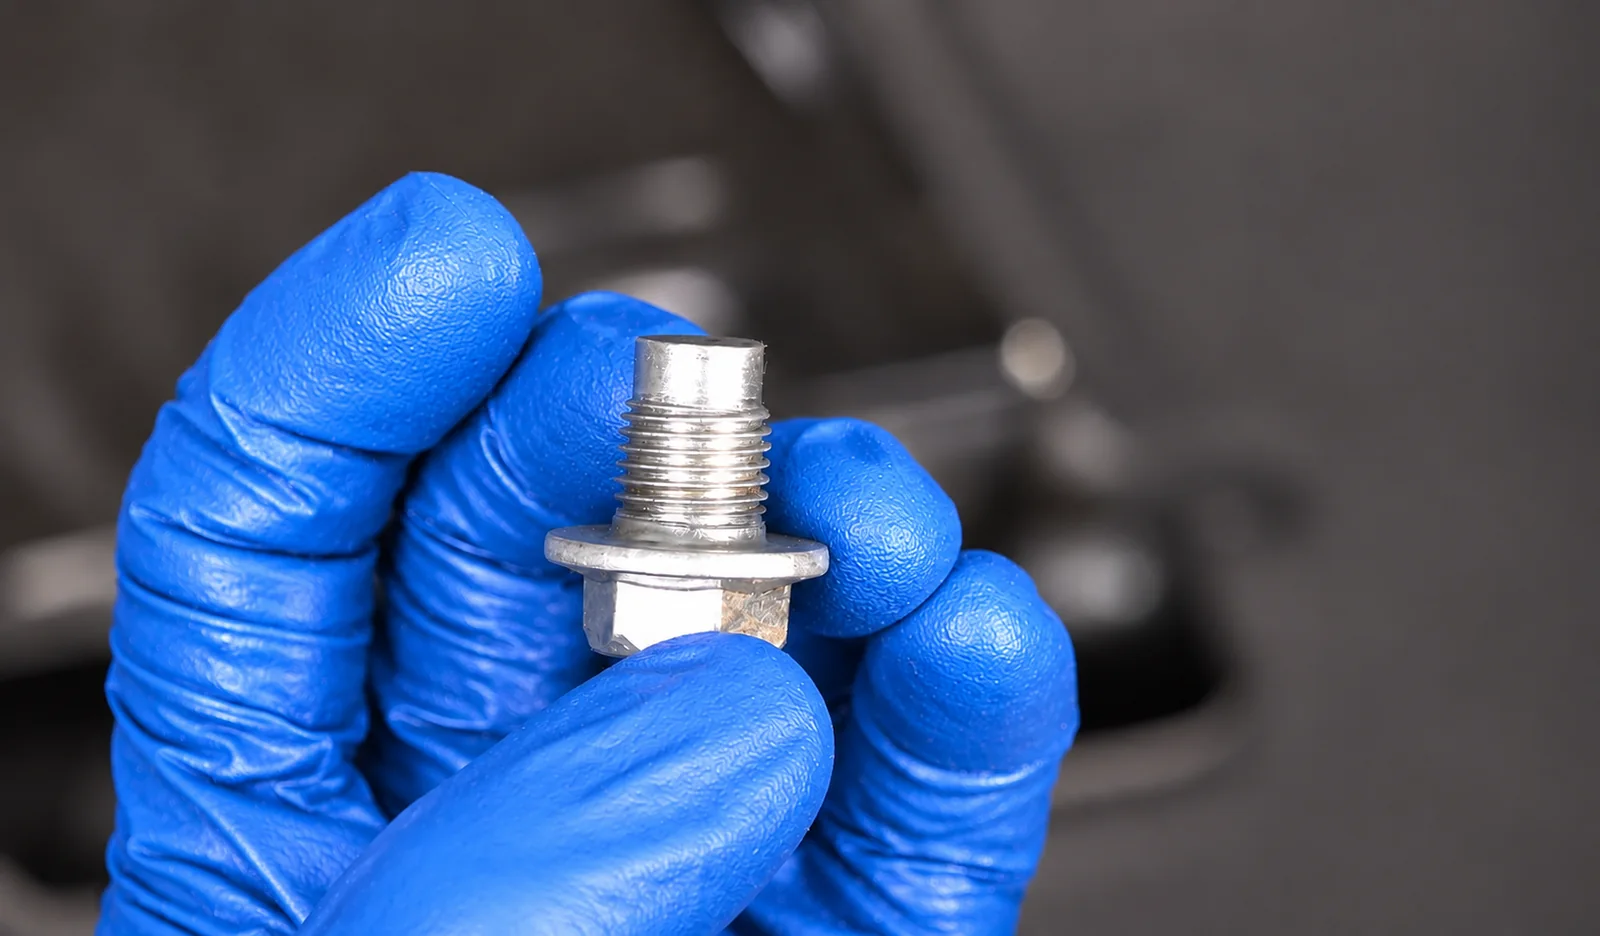
While the oil is draining, take a moment to inspect the drain plug.
Check that the threads are clean and in good condition. If the threads are damaged or the bolt head is badly rounded, the plug should be replaced rather than reused.
You also need to remove the old sealing washer.
Sometimes the washer comes off with the drain plug. Other times, it stays stuck to the oil pan.
Make sure you check both places.
One mistake you want to avoid is installing a new washer while the old one is still attached to the oil pan.
Two washers stacked together can prevent the drain plug from sealing properly. The plug may feel tight, but that doesn’t mean it will hold oil without leaking.
Remove the old washer and use a new compatible sealing washer when reinstalling the plug.
It’s a small part, but it plays an important role in keeping the drain opening sealed.
04 Step 4: Remove the Old Oil Filter
With the engine oil draining, the next job is removing the old filter.
The 2.4L turbo engine uses a spin-on oil filter located underneath the engine near the oil pan.
Position your drain pan directly underneath the filter before removing it. There will still be some oil inside the filter, and that oil will start coming out as you loosen it.
Try loosening the filter by turning it counterclockwise.
If it’s too tight to remove by hand, use an oil filter wrench to break it loose.
Once the filter starts turning freely, finish unscrewing it by hand.
As the filter comes off, keep it upright as much as its mounting position allows to reduce spills.
After removing the filter, inspect the mounting surface on the engine.
This is an important check because the old filter’s rubber gasket can sometimes stick to the mounting surface instead of coming off with the filter.
If you install a new filter over that old gasket, the filter may not seal correctly. When the engine starts and builds oil pressure, it can force oil past the improperly seated gaskets.
Make sure there’s only one gasket involved: the one attached to your new filter.
Check the mounting surface for damage, corrosion, or debris, then wipe it clean with a lint-free shop towel.
05 Step 5: Prepare and Install the New Oil Filter
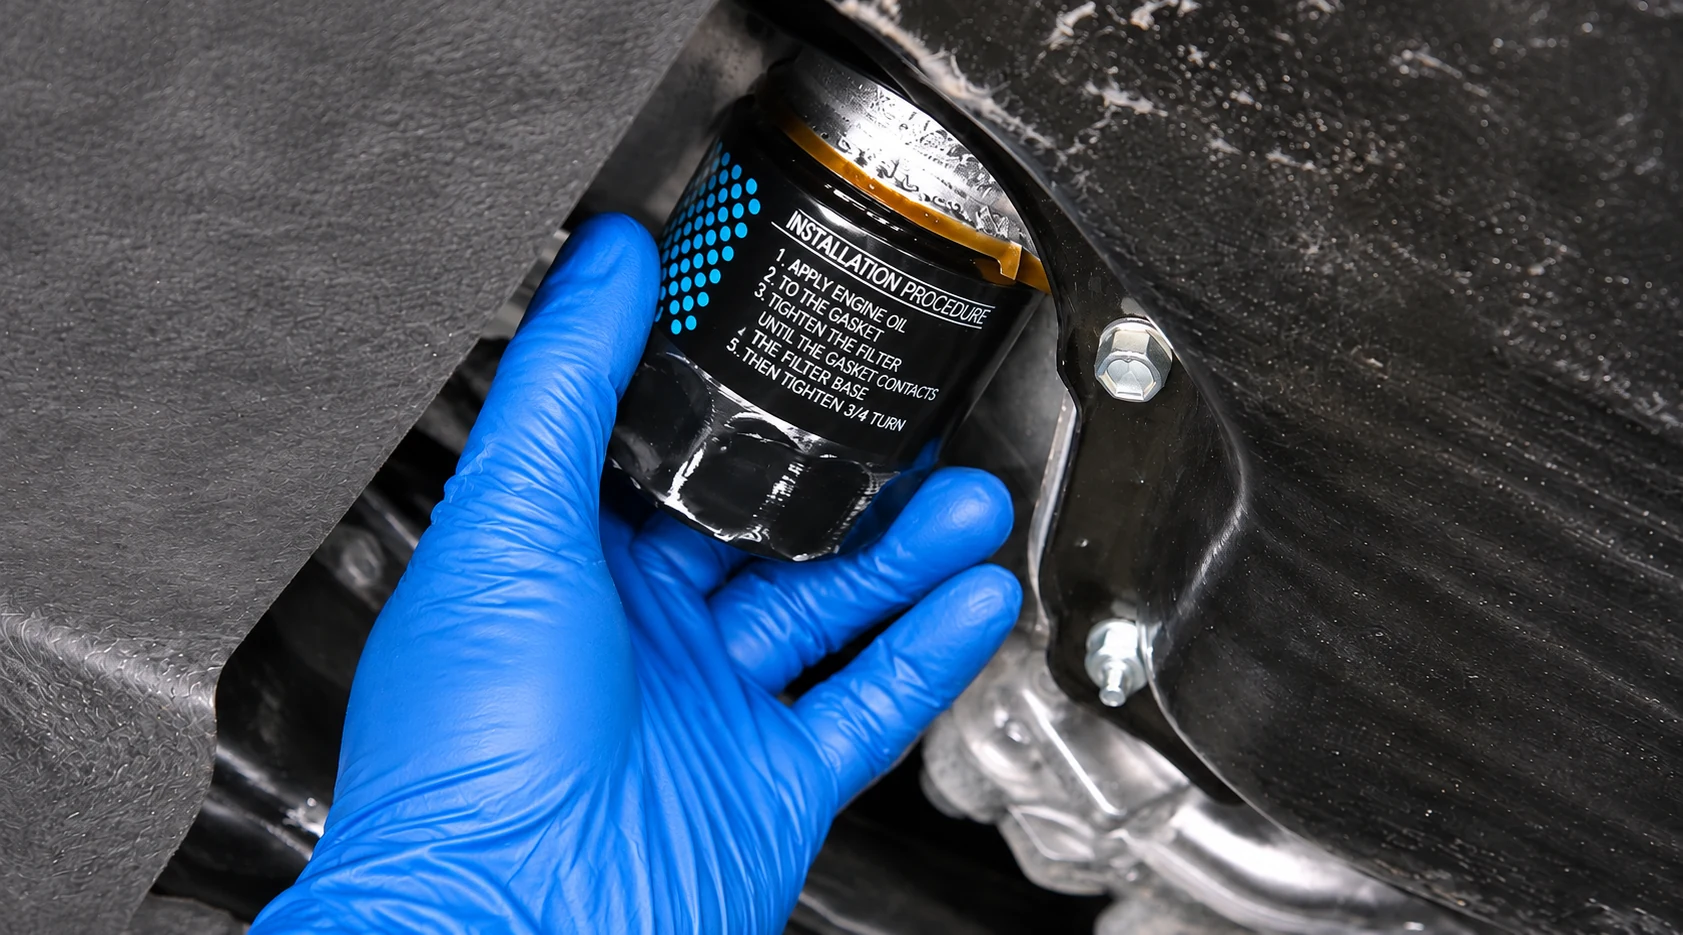
Before installing the new oil filter, make sure it’s the correct replacement for your Highlander’s engine.
Check that the filter’s threads and sealing gasket match the required specifications.
Next, look at the rubber gasket on the new filter.
Some replacement filters come with a pre-lubricated gasket. If yours doesn’t, apply a thin film of fresh engine oil around the rubber seal using a clean finger.
This helps the gasket seat properly and reduces the chance of the rubber twisting or sticking as you tighten the filter.
Depending on the filter design and installation position, some technicians also add a small amount of fresh oil to the filter before installation.
Because this filter mounts sideways, completely filling it beforehand would cause the oil to spill. Prefilling is optional unless required by the filter manufacturer.
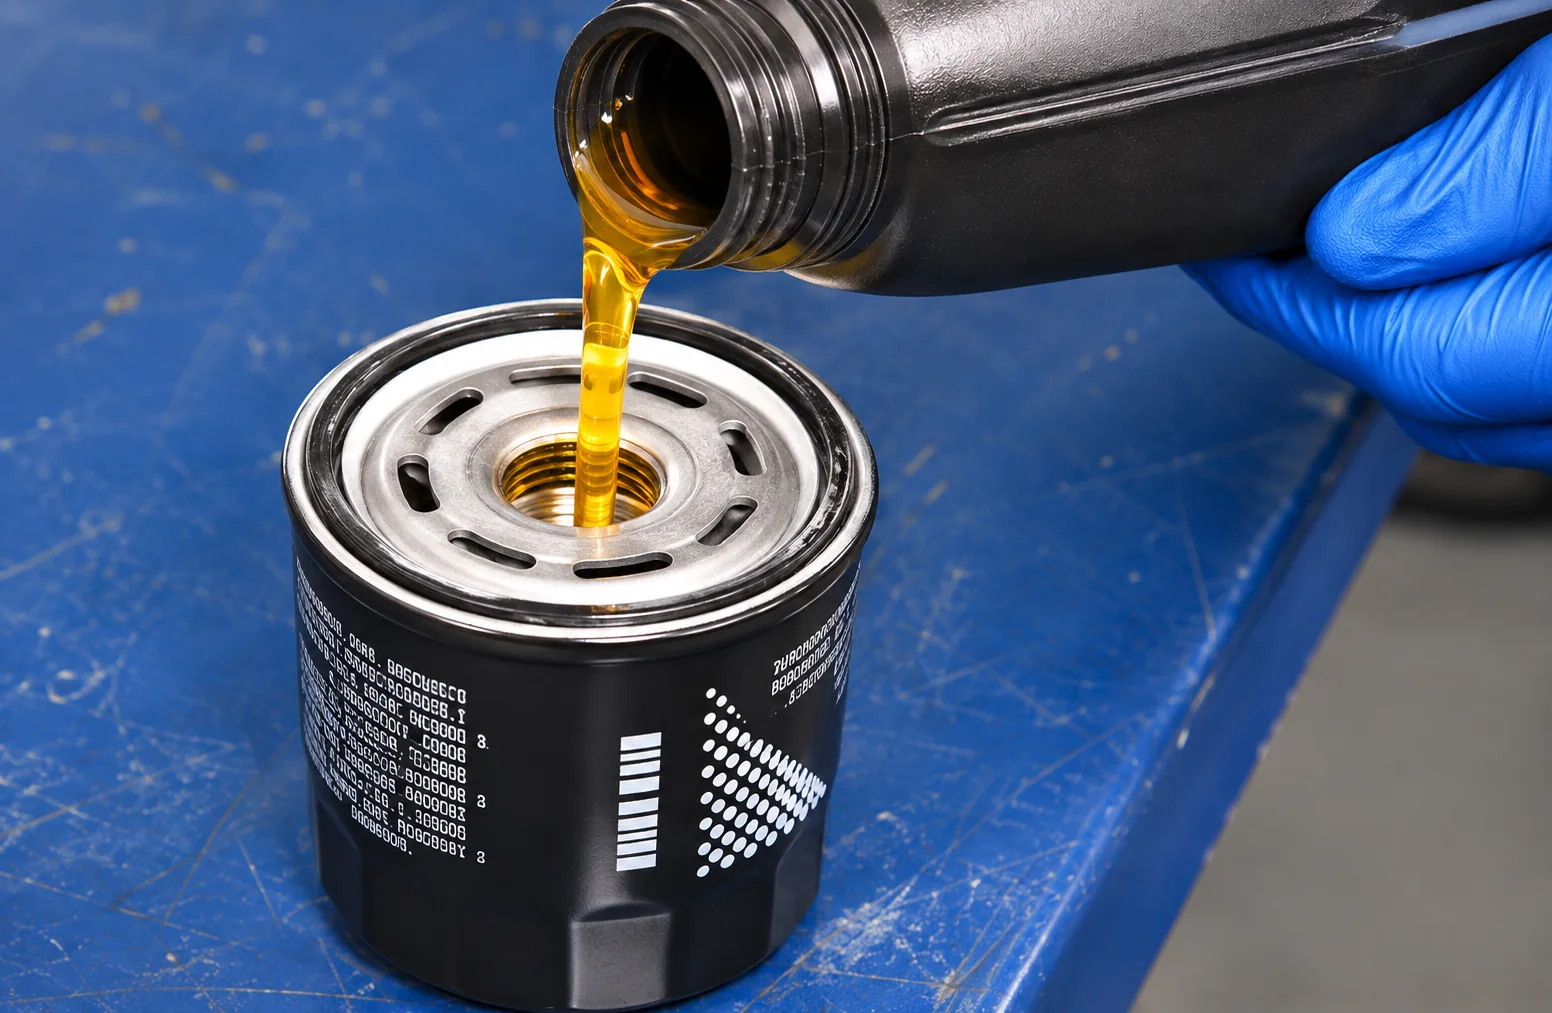
To install the filter, carefully align it with the mounting threads and start turning it clockwise by hand.
The filter should spin on smoothly without much resistance.
If it starts binding or feels crooked, stop and remove it. Trying to force it onto the threads can damage the filter or the mounting stud.
Once the filter gasket contacts the mounting surface, tighten it according to the filter manufacturer’s instructions. Many spin-on filters specify an additional half to three-quarters of a turn after gasket contact, but follow the instructions for the exact filter you’re installing.
Avoid overtightening.
A properly installed spin-on filter should create a reliable seal without excessive force. Overtightening can damage the gasket and make the filter difficult to remove during the next oil change.
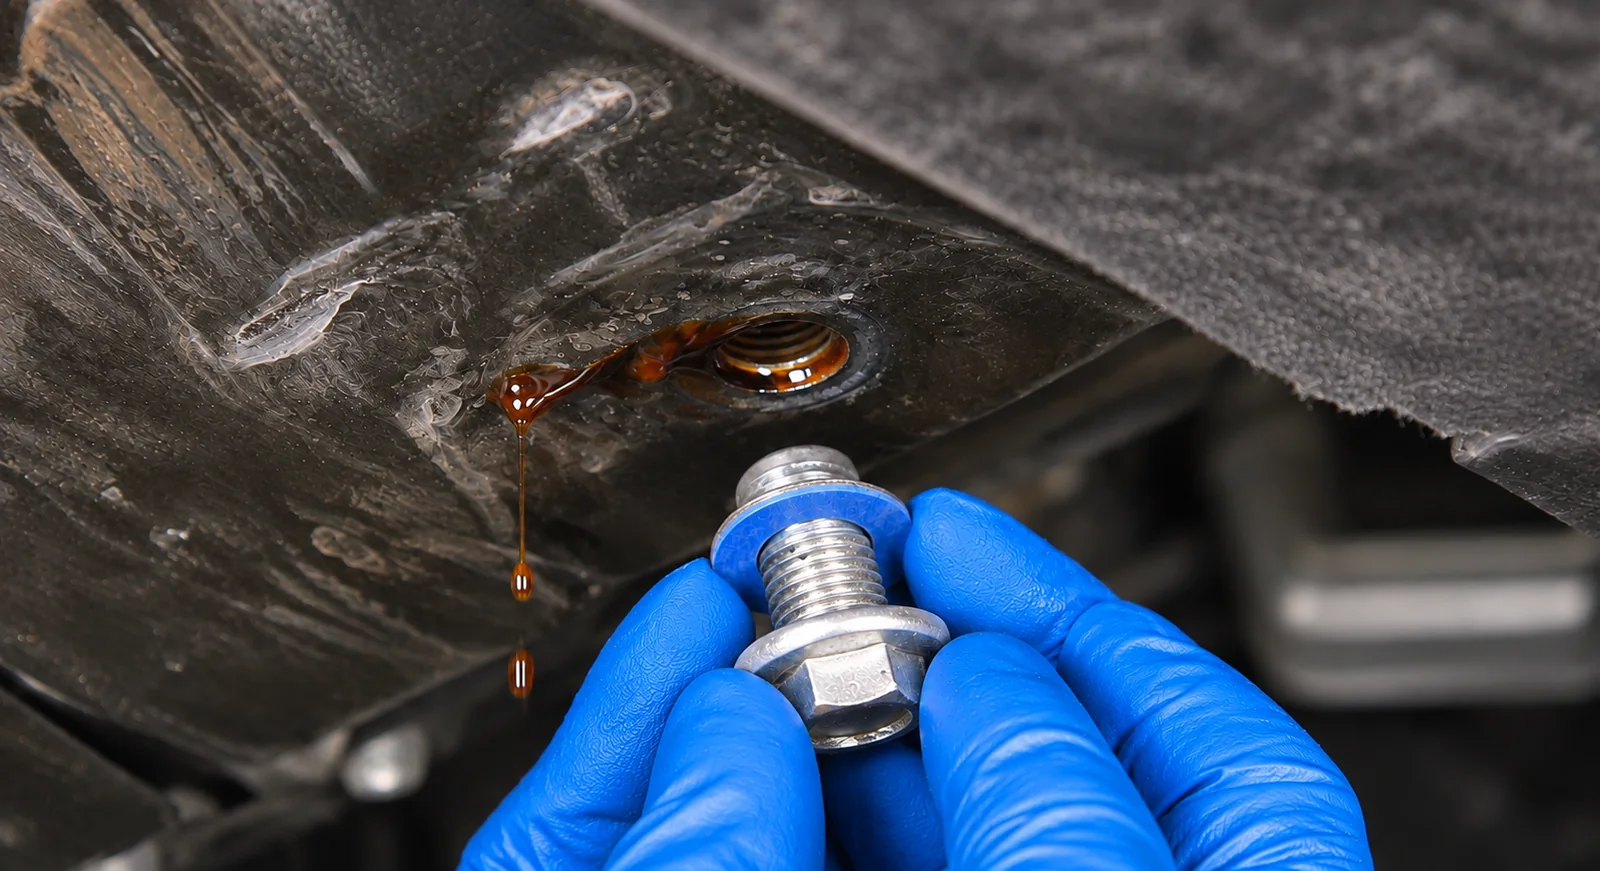
06 Step 6: Reinstall the Oil Drain Plug
Once the old oil has finished draining, you can reinstall the drain plug.
Make sure the new sealing washer is installed correctly, then carefully thread the plug into the oil pan by hand.
Don’t use a ratchet to force the plug into place.
It should thread in smoothly. If you feel unusual resistance, back it out and check that the threads are properly aligned.
Cross-threading an oil drain plug can damage the oil pan threads and turn a routine maintenance job into a costly repair.
After the plug is seated, use a torque wrench to tighten it to the correct specification.
For the 2.4L turbo engine covered here, the referenced drain plug tightening torque is 30 lb-ft (approximately 40 N·m). Verify the correct specification for your vehicle before applying torque.
Tightening the plug correctly is important. Too loose, and it may leak. Too tight, and you risk damaging the threads or sealing surfaces.
Wipe away any remaining oil around the drain plug and oil filter area.
A clean surface makes it much easier to tell whether fresh oil is leaking during the final inspection.
07 Step 7: Reinstall the Lower Engine Splash Shield
Before moving to the engine compartment, reinstall the lower access panel.
Line up the splash shield with its original mounting points and carefully start all four fasteners.
It’s best to start the screws by hand rather than immediately tightening them with a ratchet.
This is especially important when the fasteners thread into plastic mounting points.
If a screw doesn’t follow its original threads and gets forced into place, it can cut new threads into the plastic. Over time, that can weaken the mounting point and cause the screw to loosen.
Once all four fasteners are properly aligned, snug them down evenly.
There’s no reason to overtighten them. They only need to hold the panel securely in position.
Check that the panel is seated correctly and isn’t hanging loose before moving on.
08 Step 8: Add Fresh SAE 0W-20 Engine Oil
With the work underneath the engine complete, open the hood and locate the engine oil filler cap.
On the Toyota Highlander 2.4L turbo, the oil filler cap is located toward the rear of the engine on the passenger side.
Turn the cap counterclockwise to remove it.
Place a clean funnel into the oil filler opening to prevent spills.
For the 2023–2024 Highlander 2.4L turbocharged gasoline engine, Toyota specifies approximately 5.6 US quarts of SAE 0W-20 oil when the filter is replaced.
Start with slightly less than the listed capacity and check the level before adding the remaining oil.
Don’t assume that every drop of old oil came out during draining. Some oil remains inside the engine, so the actual amount needed to reach the correct level can vary slightly.
If you added oil to the new filter before installation, remember that it counts toward the total refill amount.
Pour the oil slowly and keep track of how much you’re adding.
Once the engine has been filled, remove the funnel and reinstall the oil filler cap.
Make sure the cap is tightened securely before starting the engine.

09 Step 9: Check the Engine Oil Level
Don’t finish the oil change without checking the dipstick.
The dipstick tells you whether the engine actually has the correct amount of oil.
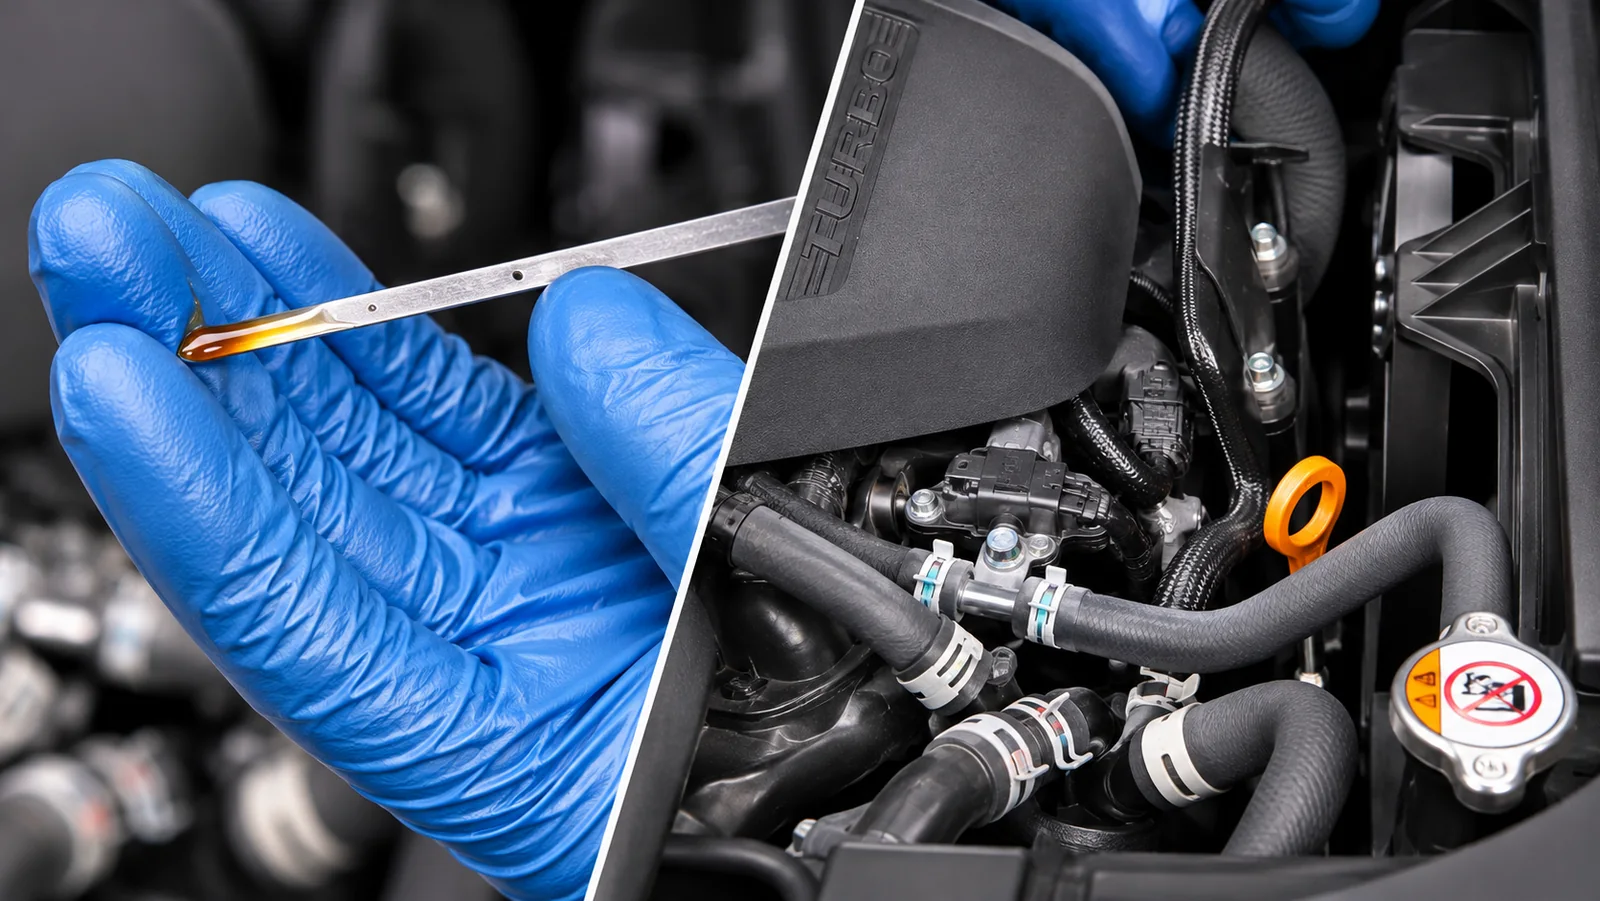
Locate the yellow-handled engine oil dipstick near the front of the engine.
Pull it out and wipe it clean with a lint-free shop towel.
Insert it fully back into the dipstick tube, then remove it again.
Look at the oil level between the two marks on the dipstick.
The lower mark represents the minimum oil level, while the upper mark indicates the full level.
The oil should be within this range without exceeding the upper mark.
Fresh engine oil can be difficult to see because it’s usually light and transparent. Holding the dipstick at a slight angle under good lighting makes it easier to identify the oil line.
After confirming the initial level, reinstall the dipstick and start the engine.
Let it run briefly so the new oil can circulate through the engine and filter.
Pay attention to the instrument cluster. The oil pressure warning should go out promptly after the engine starts.
If the oil pressure warning stays illuminated, shut the engine off and investigate the cause before running it again.
Once the engine has run briefly, shut it off and inspect the oil filter and drain plug areas for leaks. Make sure the vehicle is safely supported before checking underneath it.
Wait approximately five minutes with the vehicle on level ground, then check the dipstick again.
The oil level may change slightly after the engine has been started because the filter and oil passages are now filled.
If the level is low, add oil in small amounts and recheck until it reaches the proper range.
Avoid overfilling the engine. Excess oil can cause aeration, increased crankcase pressure, and other problems that affect engine operation.
10 Step 10: Reset the Oil Maintenance Reminder
After completing the oil change, the final step is resetting the oil maintenance reminder.
The maintenance reminder tracks when the vehicle is due for service. Replacing the engine oil doesn’t automatically clear it.
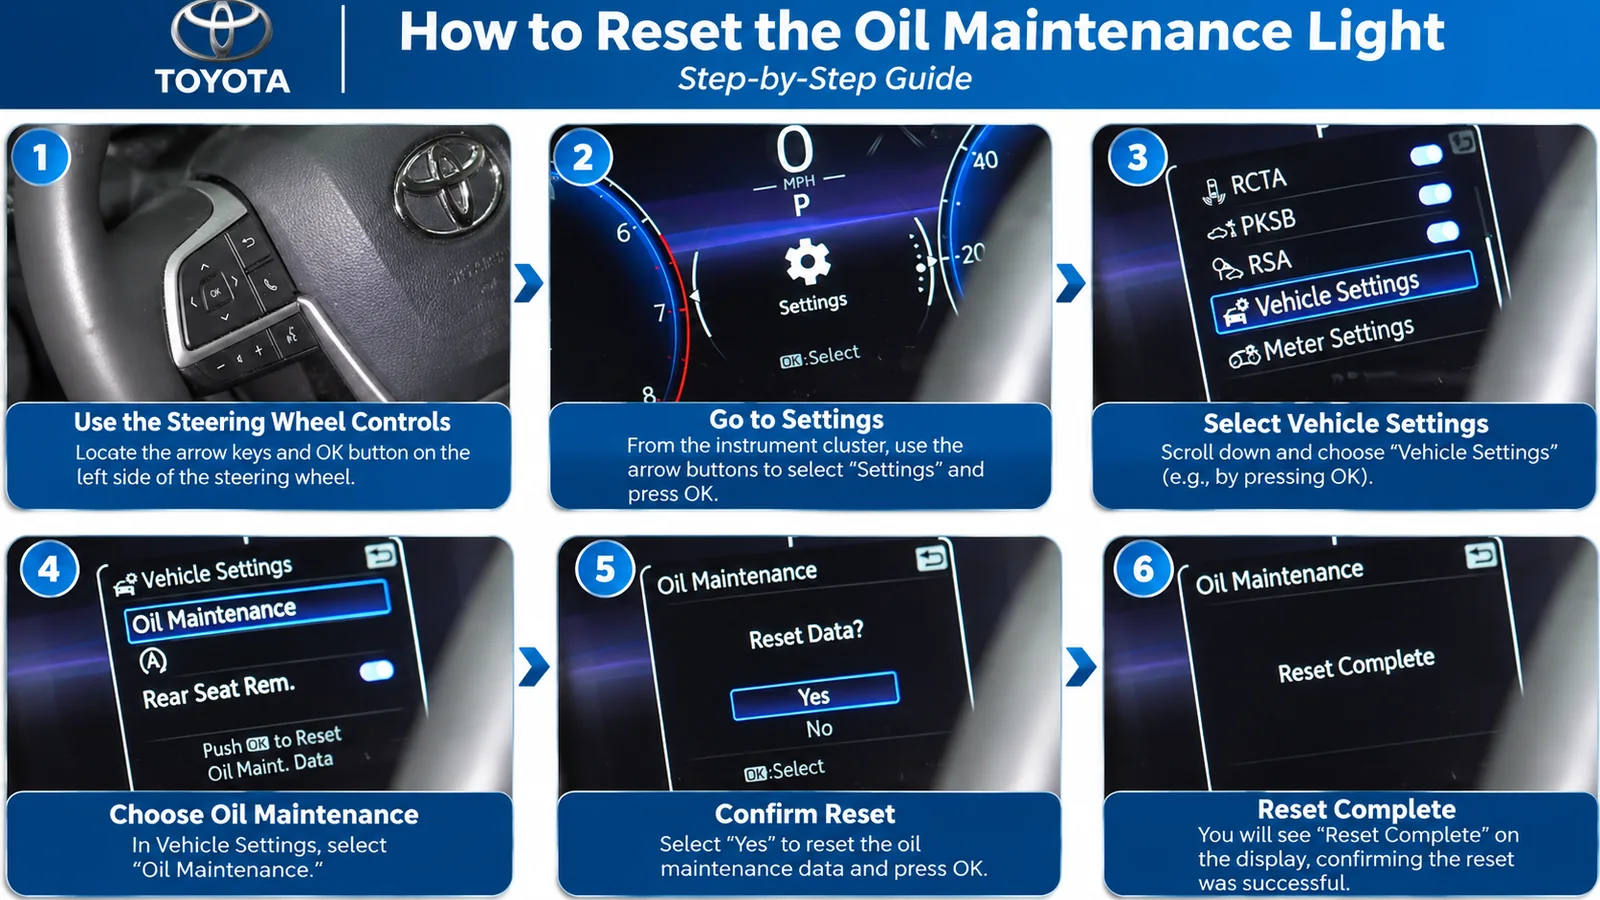
On the Toyota Highlander, the reset can be performed through the instrument cluster settings using the buttons on the steering wheel.
Start by turning the ignition to the ON position without starting the engine. On models with push-button start, this typically means pressing the start button twice without pressing the brake pedal.
Use the steering wheel controls to navigate through the instrument cluster menu.
Follow these steps:
- Open the instrument cluster settings menu using the steering wheel controls.
- Scroll to Settings and select it.
- Find Vehicle Settings.
- Scroll down to Oil Maintenance.
- Select the oil maintenance reset option.
- Choose Yes to confirm the reset.
Once the reset is complete, the oil maintenance information should update.
The menu layout can vary depending on your Highlander’s model year and instrument cluster configuration, so refer to your owner’s manual if the options appear differently.
Remember that the maintenance reminder is separate from an engine oil pressure warning or check engine light. Resetting the service reminder won’t fix an actual engine problem.
How Often Should You Change the Oil in a Toyota Highlander 2.4L Turbo?
The correct oil change interval depends on the model year, engine, and driving conditions.
For the 2023–2024 Toyota Highlander 2.4L turbo using the specified SAE 0W-20 oil, Toyota generally recommends replacing the engine oil and filter every 10,000 miles or 12 months under normal driving conditions.
However, some operating conditions require more frequent oil changes, typically every 5,000 miles or six months.
Examples of conditions that may qualify for more frequent service include:
- Extensive driving on dirt or dusty roads
- Frequent towing or heavy vehicle loading
- Repeated short trips in extremely cold weather
- Extensive idling or low-speed operation under certain commercial driving conditions
Not every driver needs the shorter interval. The important thing is following the maintenance schedule that applies to how the vehicle is actually used.
Also, keep in mind that Toyota’s scheduled maintenance inspections may occur every 5,000 miles or six months even when an oil change isn’t due.
For the most accurate maintenance schedule, refer to your Highlander’s warranty and maintenance guide.
Why Proper Oil Changes Matter for the Toyota Highlander’s Turbocharged Engine
The Highlander’s 2.4L turbocharged engine relies on engine oil to lubricate internal moving components and help control heat.
That includes the crankshaft bearings, camshafts, timing components, and turbocharger bearings.
The turbocharger operates at very high speeds and produces considerable heat during normal operation. It depends on a steady supply of oil for lubrication and cooling.
When engine oil becomes contaminated or its additives deteriorate, it may not provide the protection those components need.
That’s why using the correct oil viscosity and following the recommended maintenance schedule is so important.
Oil changes also provide an opportunity to check for problems that may not be obvious during everyday driving.
A leaking drain plug, damaged filter gasket, or incorrect oil level may seem minor at first, but any of them can lead to more serious problems if left unaddressed.
A proper oil change includes checking those details before returning the vehicle to the road.
Common Toyota Highlander Oil Change Mistakes to Avoid
Even though the oil change procedure is straightforward, a few mistakes can cause unnecessary problems.
1. Forgetting to remove the old oil filter gasket
The old rubber gasket can remain stuck to the engine when the filter is removed. Installing a new filter over it creates a double-gasket condition that can cause a serious oil leak.
2. Reusing a worn drain plug washer
The sealing washer helps keep oil from leaking around the drain plug. Replacing it is a simple precaution that helps maintain a proper seal.
3. Overtightening the drain plug
Using too much force can damage the threads in the oil pan. A torque wrench helps ensure the plug is tightened correctly.
4. Installing the wrong oil filter
Not all spin-on filters are interchangeable. Always check the replacement filter’s compatibility with the specific engine.
5. Adding too much engine oil
The listed oil capacity is a reference figure. Confirm the actual level using the dipstick rather than relying only on how much oil was poured into the engine.
6. Skipping the leak check
After starting the engine, inspect the drain plug and filter areas for fresh oil. Catching a leak before driving can prevent a much bigger problem.
These are simple checks, but they make a real difference in the quality of an oil change.
Toyota Highlander 2.4L Turbo Oil Change FAQs
What type of oil does a Toyota Highlander 2.4L turbo use?
The 2023–2024 Toyota Highlander 2.4L turbocharged gasoline engine specifies SAE 0W-20 motor oil that meets Toyota’s recommended oil grade requirements.
How many quarts of oil does the Toyota Highlander 2.4L turbo take?
The 2.4L turbocharged engine requires approximately 5.6 US quarts (5.3 liters) with an oil filter replacement. Always verify the final oil level using the dipstick.
Where is the oil filter located on a Toyota Highlander 2.4L turbo?
The spin-on engine oil filter is located underneath the engine near the oil pan. It can be accessed by removing the lower passenger-side engine access panel.
What size socket do you need for a Toyota Highlander oil change?
For the configuration covered in this guide, a 14 mm socket is used for the oil drain plug, and a 10 mm socket removes the lower access panel fasteners.
What is the oil drain plug torque for the Toyota Highlander 2.4L turbo?
The referenced oil drain plug tightening specification is 30 lb-ft (approximately 40 N·m). Verify the specification for your exact model and engine before tightening.
Do you need to change the oil filter every time you change the oil?
The oil filter should be replaced according to the vehicle’s scheduled oil and filter maintenance requirements. Replacing it during an oil change helps prevent accumulated contaminants from remaining in the filtration system.
How do you reset the oil maintenance reminder on a Toyota Highlander?
The oil maintenance reminder can be reset through the instrument cluster’s Vehicle Settings menu. Locate Oil Maintenance, select the reset option, and confirm the selection.
Can I change the oil in my Toyota Highlander myself?
Yes, if you have the correct tools, replacement parts, and a safe way to access the underside of the vehicle.
However, if you’re unsure about the oil specifications, proper filter installation, or safe vehicle support, having the service performed by a qualified automotive technician is a practical choice.
Professional Toyota Highlander Oil Change in Sarasota, FL
Keeping up with regular oil changes is one of the simplest ways to help protect your Toyota Highlander’s engine, but using the correct oil and completing the service properly matters just as much as the maintenance interval.
At Sherman’s Auto Repair in Sarasota, FL, we provide professional oil changes and routine vehicle maintenance based on your vehicle’s specific requirements.
Our ASE-certified technicians handle important details such as selecting the appropriate engine oil, replacing the oil filter, checking the final oil level, and inspecting accessible areas for signs of leakage.
Whether your Toyota Highlander is due for an oil change or you need help with other scheduled maintenance, we’re here to help keep your vehicle dependable.
Schedule Your Oil Change at Sherman’s Auto Repair
Sherman’s Auto Repair
757 Gantt Ave, Suite 9
Sarasota, FL 34232
Phone: (941) 444-7057
Explore Our Oil Change Services in Sarasota, FL
Explore Our Toyota Repair & Maintenance Services in Sarasota, FL
Get the right oil change for your vehicle with professional service from Sherman’s Auto Repair.

